In this guide, you will learn the meaning of a directory. You will also learn how to move and copy files from one directory to another.
Information and images in this guide are taken from this series of lessons created by Vanderbilt Libraries Digital Lab. We also link out in several places to the excellent CompSci SuperBasics website lessons.
A directory is the same thing as a folder. A folder is a place where you can store other folders and files. For example, the Downloads folder is a directory that accepts all downloaded files and folders. Because it can be difficult to manage numerous files in one directory, we're able to create many different directories to organize our files, also known as file management. The different ways we organize our files and folders creates a directory tree. See the graphics below for a look at a directory tree on both Windows and Mac that shows folders and files and how they can be organized.

This organizational system is called the directory tree.
On Windows, file storage drives are assigned drive letters. The typical drive letter assigned to a computer’s hard drive is c. The drive letter is followed by a colon, so we would refer to the c drive as c: .
The very top of the directory tree is called the root directory. You can think of it as sitting directly on the hard drive.
We can describe the position of a file within the directory tree using an expression called the path to the file. The path describes the position of the file by listing all of the directories from the root to the file, in order and separated by backslashes ( \ ) on Windows and forward slashes ( / ) on a Mac.
The root directory is simply a backslash by itself. When writing full paths in Windows, the directory path is written following the drive letter, so the full path to a file in the root directory (like file2 in the diagram) would be:
c:\file2

The root directory in a Mac is just a forward slash, so you can write file 2 as
/file2
Several special folders in a Mac (Documents, Downloads, Pictures, etc.) are duplicated for each user. These special folders (a.k.a. directories) are kept sorted by placing them in what is known as the home directory for the user. When a user logs onto the computer, the operating system takes note of which user home directory is appropriate, and uses that home directory as the basis of reference for the other special folders (Documents, Downloads, etc.).
Because of the special status of the home folder, it has a special abbreviation in Linux: a tilde (~). In the diagram above, the full path of file6 would be:
/users/user1/file6
but it can be abbreviated as:
~/file6
Now that you understand directories, how do you move files between them? The easiest way is to drag and drop the files from one directory to another using Windows' File Explorer or Mac's Finder. To do this, it is often helpful to open two Finder/File Explorer windows.
Windows:


If the directory is in a different hard drive, such as on your computer, dragging and dropping will copy the file to the new directory. This means the file will exist in both directories.


1. The simplest way to see what's in your directories is to use Finder (on a Mac) or File Explorer (on Windows). Here's some more information about how to use File Explorer for Windows and Finder for Mac.
2. You can also view what's in your directories via the command line. To find and explore the command line, we recommend these interactive lessons designed for beginning programmers.
3. Finally, your IDE (Interactive Development Environment) will also usually give you a view into your directories. For example, JupyterLab has a file browser that looks like this:

. . . while RStudio has one that looks like this:

The best way to avoid confusion about your working directory is to set it properly when you start your session. As explained on the JupyterLab Desktop ReadMe, you can start a new session by using the links at the Start section of the Welcome Page.
New notebook... creates a new notebook in the default working directory.New session... launches a new JupyterLab session in the default working directory.Open... starts a new JupyterLab session in the selected working directory. If files are chosen, selected files' parent directory becomes the working directory and selected files are opened in the session. On Windows and Linux Open Folder... and Open Files... options are presented as separate items.Connect... creates a session by connecting to an existing JupyterLab server running locally or remotely. Locally running JupyterLab servers are automatically detected and listed in the Connect dialog.Similarly, CLI launches of the application, dropping files and folders, and double clicking to open files create new sessions as well.
Previously opened sessions are stored as part of application data and they are listed on Welcome Page. Clicking an item in the Recent sessions list restores the selected session.
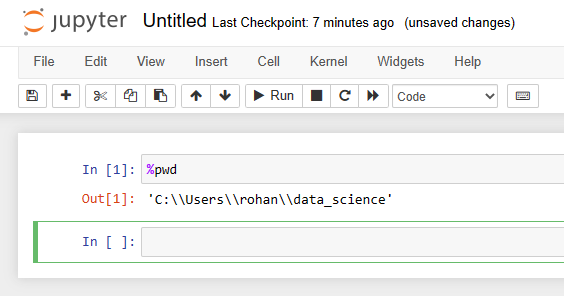
You can verify that you have the correct working directory by using what's called a magic command:
Use the %pwd magic command within a code cell to print the current working directory. The output will display the current directory path.

Read more about navigating JupyterLab files and directories on their documentation site.